Mandala Geometric pattern 2022 - new method
Apologies for taking so long to do this, but the condition I have that affects my feet won’t let me sit at the computer for long.


Original Mandala Geometric blanket © Justdunny
In allowing access to this pattern, I grant the right to make this blanket for your personal use. It would be a joy if it was acknowledged as a Justdunny design. However I reserve all rights to text and images. Please do not copy, duplicate or distribute this pattern or contents.
UK TERMS USED THROUGHOUT (tr = US dc, dc = US sc)
The pictured blanket was made using 8 ply (DK) acrylic yarn and a 4.00 mm hook with my no-hole corner. Gauge is not so important for a blanket. The size may vary, though. This blanket is about 6’ (180 cm) long by about 5‘ (150 cm) wide. The central part is a 5 x 5 square of squares and blocks (“block” refers to smaller squares joined to make the same size as the large squares) approx. 21 cm wide x 5 = 105 cm (42 inches). I have not made this version of the blanket at this stage but have used the new corner method in several blankets.
Colours used: from lightest tone to darkest.
White – small amount for centres – less than 1 ball.
A = Aqua –about 3 to 4 x 100g balls B = Jacaranda blue – about the same.
C = Bright violet – about 2 to 3 balls D = Deep purple – about 4 balls.
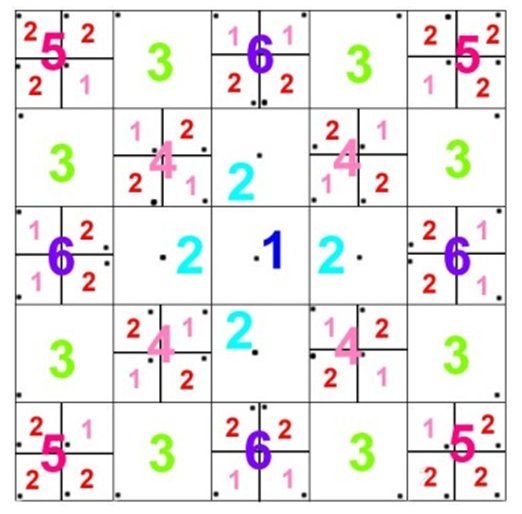
Squares needed for central part of blanket
Large - 1 x sq1, 4 x sq2, 8 x sq3.
Small - 20 of small square 1 and 28 of small square 2 for blocks 4, 5 & 6.
All 61 squares start with the same white centre.
All large and small squares are worked over -
CENTRE/CORNER SQUARE: with white –
1) Into magic ring, 2 ch for 1st tr (US dc), 1 tr, (1 ch, 3 tr) 3 times, 1 ch, 1 tr, sl st to BACK LOOP of starting ch. Insert hook below the 2nd of the three strands of the same ch & draw up a 2nd loop. YOH & draw through both loops to make a dc (US sc).
2) Work 1 dc in next tr. *Into the corner ch (not the ch space. Insert hook under 2 strands of the 3 in the ch), work (1dc, 1 loose ch or 2 tight chs if preferred, 1 dc). Work 1 dc into each of the 3 trs on the next side. Repeat from * twice. Work the last corner in the same way, 1 dc into the first tr, sl st to the first dc. Should be 7 sts on each side counting the corner chain at each end. Break off.
NOTE – Any method of ending & beginning rows or rounds will be fine as long as the stitch count is the same as the other sides.
Large central squares 1, 2 & 3 - instructions
Work in rounds over a white centre square as above for Squares 1 & 2, working 1 st into each st to the corner ch, work corner & continue working the required st into each stitch of the next side to beg, sl st.
For TR row corners – work 1 tr into the corner ch, 1 tr into the body of that tr (lowest part of the stitch catching 2 threads), 1 ch, dtr into the same corner ch, htr into the body of that dtr.
For DC row corners – work 1 dc into the corner ch, 1 loose ch (or 2 tight ch if desired), 1 dc into same corner ch.
Work over two sides only of a white centre square for Square 3, turning where required and working back. NOTE - Because rows are only worked over two sides, more rows are needed.
Small mitred squares 1 & 2 are worked in the same way as Large central square 3 with fewer rows.
Use the tables below to make the large squares & small squares.
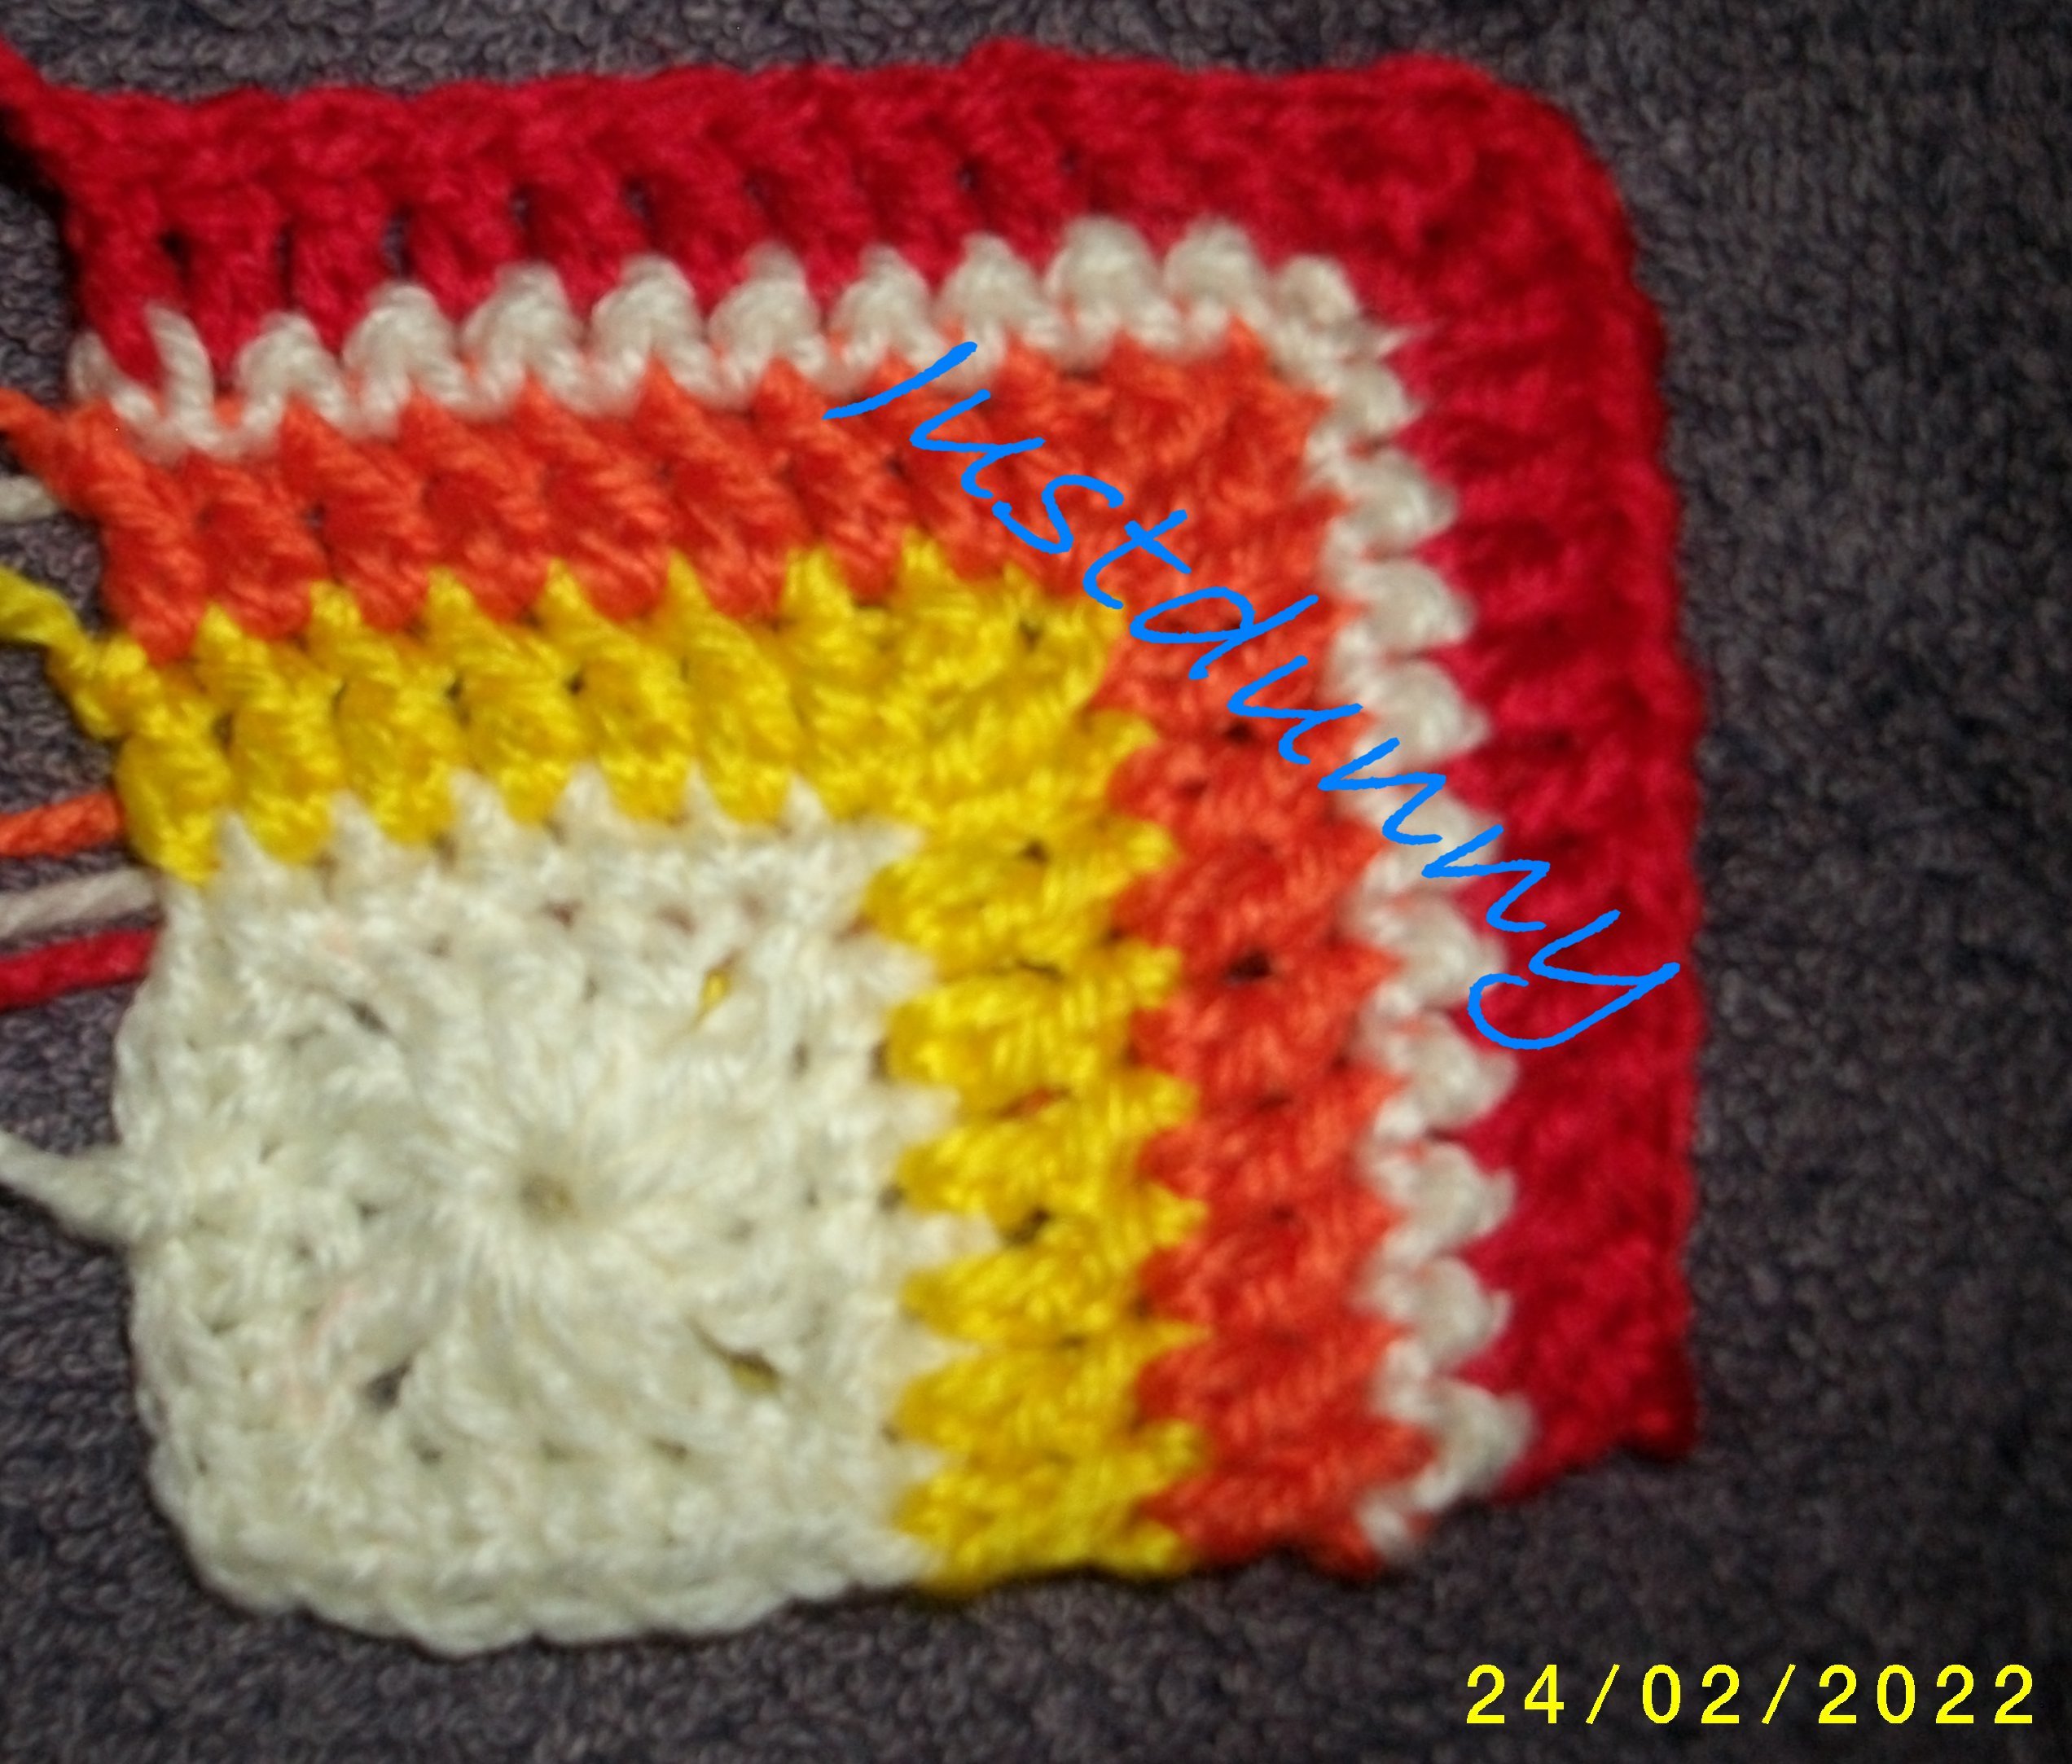
Small mitred square demonstrated
Large central squares 1, 2 & 3 - progression of rounds/rows over white centre square

Small mitred squares 1 & 2 - progression of rounds/rows over white centre square

Assembly
Use the schematic below to assemble blocks 4,5 & 6 with any joining method you prefer. NOTE – placement of white centre/corner squares is shown as a dot in each square in the schematic below.
I favour crochet methods of joining as they maintain the stretch of the piece. Join all squares. Finished size should be about 105 cm (42 inches).
At this stage, can be finished with a few rows of tr or other. To work around it, work into the sts that present in the usual way. Where trs are lying horizontally (eg on the outside edges of small square 2 in the corners), work 1 tr into the top of the st and work into the body of the same st, picking up two strands. Instructions to work the additional squares on two opposite sides to make the work rectangular follow.
Squares for two ends to make blanket rectangular worked in rounds as for large squares 1 & 2
Stitch counts are for each side including the corner chains at each end.

CENTRAL SECTION (see below) Take one of the centre edge squares ©.
1) With C work tr along one side only. Break off.
2) With B work 1 row tr over row 1.
3) With A work 1 row dc over row 2.
4) With B work 1 row tr.
5) With C work row tr.
Work same rows on the opposite side. Repeat for the other square C. Join squares as in the main picture - ABABCBABA. With D, work 1 row of dc around the whole strip. (21 sts x 9 squares = 189 + 18 sts added to C = 207 + 2 from dc round = 209 sts)

I crocheted around the blanket using the same corner method at the corners, alternating the colours depending on whim and availability – 12 rows in this case. I finished with a row of crab stitch – just work dc from left to right, ie backwards.
I hope this sorts out some of the confusion and you enjoy making this. A more step-by-step pattern will follow as I can sit at the computer for longer.
Justdunny (Toni)
February 2022